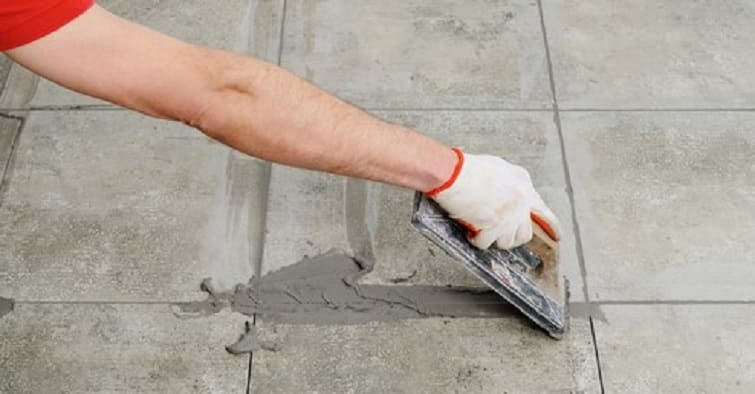
First of all, what is grout and how to grout tiles? Grout is the smooth, cement like mixture that fills the joints between the tiles. It may be an easier task to tiling, but it is important that it is done correctly as it ensures moisture and dirt cannot sit in the joints. A neat grouting job greatly affects the overall look of a tiled surface.
Decide what type of grout you will need. There are 2 types of grout, sanded and unsanded. Sanded grouts are designed for wider joints 4mm and over. Unsanded grout is used for smaller joints. Choose a colour that will complement the tile keeping in mind the following points. A grout colour similar to the tile will help to hide any imperfections in joint size and in the laying of the tiles. A contrasting grout colour will make the tiles really stand out if they have been well laid. Once you have made your selection, it is now time to prepare the tiled area for grouting.
The tile adhesive should be allowed to cure for at least 24 hours after completion. Correctly preparing the tiled area for grouting will have a direct result on the finished product. All tile joints must be dry and clean from any dust, debris and any adhesive that protrudes from the tile. To clean excess adhesive from the joints, use a sharp blade or knife to cut it away from the tile. Be careful not to damage the surface or edge of the tile when doing this. Sweep or wipe the tiled area thoroughly. If there is a lot of dust, you may wish to use a vacuum cleaner to thoroughly remove it from the joints.
Now that the tiled area is clean and dry, it is time to mix the grout. Always be sure to follow the manufacturer’s instructions, bearing in mind these points. Most grouts should be mixed to a smooth, toothpaste-like consistency. To achieve a workable mixture, most grouts should also be let to stand for approximately 10 minutes after mixing and then re-mixed just before application. Be sure to mix enough grout to complete the tiled area. Use gloves when applying grout as it may harm your skin.
Using your grout float, carefully but firmly apply the grout to the tile joints. The best method to achieve full and smooth grout coverage is to hold the grout float at a 45 degree angle to the tiles and spread in a sweeping, S-like motion. This method will help to ensure the grout lines are filled consistently and that less grout is left on the surface of the tiles. Also try to move the grout float at a diagonal angle to the tile joints. If you run the grout float in the same direction as the tile joints, the float can dig into the joints creating uneven coverage. Only ever apply grout to a few square metres at a time, leaving enough time to wipe the surface before the grout dries on the tiles.
Collect 2 clean buckets of water and a clean sponge. Once the grout has visibly started to dry on the surface of the tile (approximately 10 – 15 minutes) it is time to begin cleaning. Dip your sponge into the first bucket, wringing it out thoroughly. Clean in a circular motion across the surface of the area you have just completed grouting, rinsing the sponge as needed. Be sure not to wipe in the direction of the tile joints as this will wipe out the grout. After completing this initial wipe, the tile surface will look muddy however the final clean will fix this. Using the second bucket of water, clean more thoroughly, but still carefully, removing all remaining grout from the surface of the tiles. Clean the sponge regularly as needed.
After the grout has cured for approximately 4 – 5 hours, re-wipe the surface again with a sponge and clean water to remove any grout haze. Follow the same instructions for wiping as mentioned in the previous step, being careful not to damage grout joints as the grout takes 24 hours to fully cure. After 24 hours, if there is still a slight haze on the tiles, repeat this step.