What is more Australian than to relax and have a good time with your family and friends in your own backyard? To make the most of your outdoor area however, you should consider laying pavers. Pavers can not only make your outdoor area easy to maintain but also transforms it into a luxurious space, a place you love to be. So, how to lay pavers for your outdoor area?
Paver Options
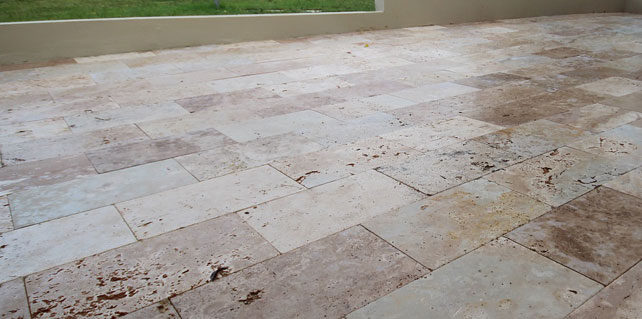
There are many options of pavers available in Sydney. The most common types of pavers are clay and concrete pavers. They certainly are practical but lack originality and authenticity. That’s why we recommend natural stone pavers. The natural stone pavers available at TFO include varying sizes of travertine pavers and sandstone pavers. You’ll be surprised to see that the prices of these natural stone pavers are no more expensive than many clay and concrete pavers available at other tile stores. Natural stone pavers are full of character allowing you to create an area that you’ll grow in love with more as the pavers age gracefully.
How To Lay Pavers
Laying pavers is not as difficult as some may think. For that reason, some people choose to do it as a DIY project. If you are planning on laying pavers yourself, here are some tips for you to follow.
1. Planning
Work out the size of the area to be paved so that you can order the correct amount of materials needed. If the paving area is attached to the house, make sure that the area slopes away from the house so that rain water will drain properly.
2. Preparation
Mark out the four corners with stakes. Stretch a string between the stakes at the level you want the paving to be. Once the string is levelled using a spirit level, you can adjust the height of the string to create a small slope if necessary. A 4mm slope for every 1 meter is usually sufficient to let rain water drain away.
Remove the topsoil in order to lay a bed of sand before laying the pavers. For normal residential use, a bed of sand 25mm thick should suffice. For heavy traffic and driveways, a thicker base is required. Make sure to remove all plants and roots as well as soft spots which can be filled with gravel. It’s important to make sure that the ground is firm, level and also well compacted.
Put timber formwork around the area to be paved and support it with stakes inserted behind the boards. Make sure that the tops of the boards are level for the next step, screeding.
3. Screeding
Lay a 25mm thick bed of sand. You can achieve a levelled screeded surface by using a board which is notched to fit inside the surrounding boards, with a depth 10mm less than the thickness of the pavers. This allows for compacting sand. Run the board along the top of the surrounding boards. Do not screed the entire area at once.
4. Laying Pavers
Start laying from the corner of the area. Put each piece of paver flush against each other with narrow gaps of 2-4 mm in between. It’s best to use tools such as a trowel to control the final position of the pavers. Every time you lay an area of about one square metre, you should use a rubber mallet and a long timber board to level the tops of the pavers.
For cutting pavers, an angle grinder with a diamond blade cutting disk may be used. However, if there are many pavers to be cut, it may be faster to hire a wet saw.
Once the whole area has been covered with pavers, spread a mixture of 4 parts clean dry sand and 1 part dry cement over the pavers and sweep it into the joints. Once all excess sand and cement is removed, sprinkle water over the whole area allowing the pavers to set.
5. Borders
To prevent the pavers from moving away from their original position, you can simply leave the timber formwork boards if they are treated or put invisible concrete borders around the paved area just under the surface.
